Showing posts with label home decor. Show all posts

Monday, August 6, 2012

Preston's Chic Nursery

The lovely Chrystal Cienfuegos photographed some lovely pictures of little Preston right after he was born and while she was at my sisters house she shot these gorgeous pictures of Preston's nursery.  It is so chic and cute while still being so lovely and baby.  Plus, its yellow and gray, my favorite!!!


I wish this was my room!

Chair:  Babies R Us
Crib:  Jenny Lind crib painted gray
End Table:  thrift store find painted yellow
Ottoman:  Ikea
Curtains:  Made by Ruthie (my sister) fabric from Fabric.com
Crib sheet:  Etsy
Wall Prints:  Etsy
Button K:  made by me for the shower
Lamp:  thrift store find painted gray, shade from Ikea
Boppy Cover:  Etsy

Monday, June 4, 2012

Work with what you GOT-Painted Kitchen Floors

FLOOR UPDATE:  (4/15/2015)
I know you have all asked for update pictures and I have FINALLY gotten around to snapping some iPhone pictures to share.  The floors are now 3 years old and while they are dirty in these pictures (sorry), they are still holding up really really well.  I am very pleased with their duration of numerous gatherings and 3 toddlers constantly running, playing and dragging toys along them all day long.  I would still recommend this method and am pleased with them each time I look down.  


We have an update in the ever evolving kitchen.  I recently painted the linoleum kitchen floors (another Pinterest inspiration) with regular old house paint.  It was a fun process and not one that I was sure was going to "stick" but it did and I am so happy.  Before I go into detail about the "how to" here are some kitchen evolution shots...

Picture 1:  How the kitchen looked when we moved in

 Picture 2:  How the kitchen looked after we painted the kitchen cabinets white and installed new Ikea counter tops, added a white subway tile backsplash, and painted the walls.

  Picture 3:  How it looks now, after the painted floor project
I am so in love it with it.

So now for the HOW TO...

Let me start with saying that painting linoleum is not for all linoleum.  Peel and stick or slick linoleum will not work for this process.  We had old, worn linoleum that was installed in one big sheet.  My sister-in-law tried to paint her peel and stick bathroom linoleum and the paint is just peeling right off.

Here is the process:
Step 1:  clean floors really well and let them completely dry (I used a degreaser and mopped the floors)
Step 2:  Paint the floors with the Base/Bottom color.  I used Behr Paint and Primer In One-FLAT.  Here is a picture of the paint cans. 

Step 3:  Stencil the design.  I bought a Martha Stewart stencil from Michaels and used the same Behr paint in a different color. I used a small foam roller to keep the paint even, make sure you don't load the roller with too much paint or it will bleed under the stencil and make a mess.  As far as the placement goes, the old linoleum had squares in it so I just used them as a guide and did every other square.
Step 4:  Let paint dry and then apply poly urethane.  I used a water based poly and followed the instructions on application.  I applied 4 coats of poly just to be safe.
Let dry for 2 days to be absolutely sure its cured and DONE!!!  We have had these floors painted for about 2 months and they still look absolutely gorgeous.  

In case you are wondering about paint colors, the colors are:
Base:  Glidden GLN40-Wood Smoke, I had it color matched so that I could use the Behr prime/paint
Stencil:  GLC13-Crisp Linen White, also color matched to Behr Prime/Paint 
Color Codes:

Here are a couple more shots of the floor taken just this morning.


Please email me or leave a comment if you have any questions about technique or process.  And leave a link if you did this yourself, I would love to see others work.

:)

Friday, April 13, 2012

Kitchen Floor sneak peak

This is what I have been up to for the last 3 days...more details to follow soon.


Thursday, March 22, 2012

Day 2 Progress

Today is my second day of working on my office area. Still lots to do and I can only work on it in between Eli naps and trying to get Exquisite Blooms work done. I am so excited to finish it soon.


Wednesday, March 21, 2012

New Project

I am in the middle of another new project.  Here is what the corner of our bedroom, otherwise known as my office looks like right now.  Lots of fun coming my way with fun ways to organize each and everyone of those cubby holes...so excited!


Tuesday, March 20, 2012

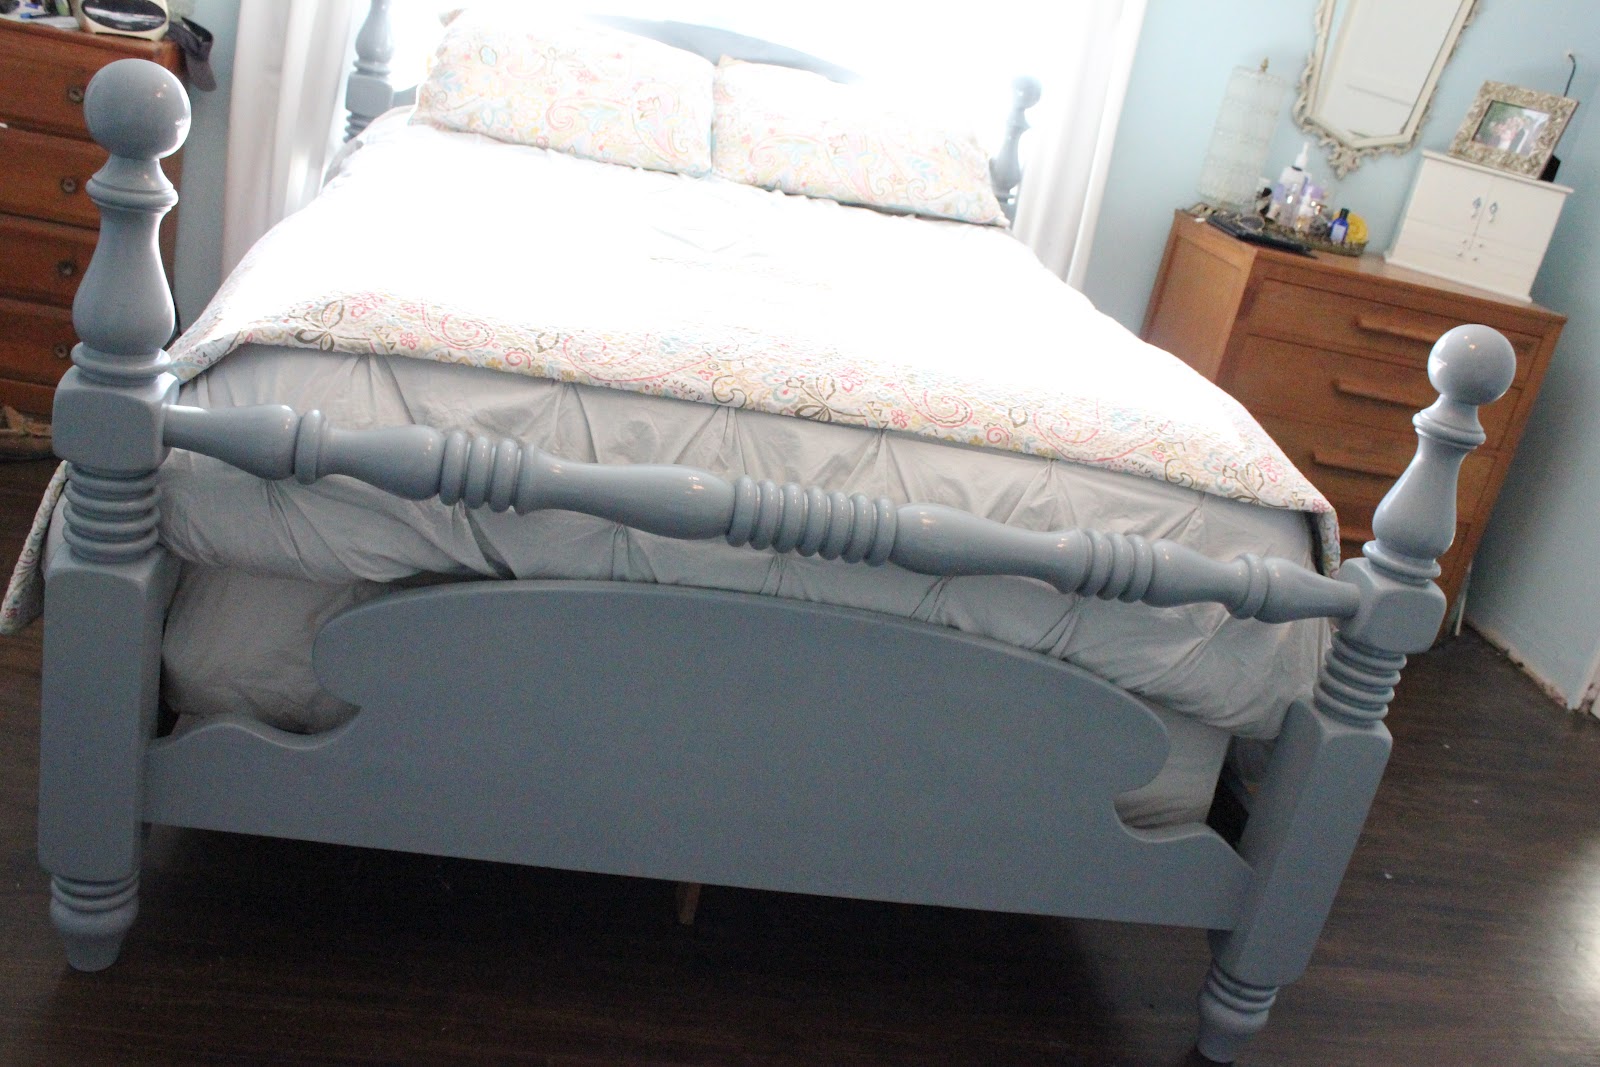
Bed is done!

I got a chance to paint the bed I got from my grandparents last week and love the way it turned out.  My mom came over to see it and told me that if she had known it was going to be that cute, she would have kept it for herself :)...too late!

Here she is...


And just as a reminder, here is what she looked like before.

Now that the bed is in the room though, I am definitely going to forgo the idea of leaving the dressers the original color and I will be painting them white to match the gray blue bed a little better.  Also, I am not loving the color of my walls now but I will have to live with them because the thought of painting that room again makes me nauseous. 

I just love the bed, I love the details and the shape and the color.  Oh and as an added bonus, our bed is no longer on wheels so it doesn't roll all over the place making it hard to reach my phone or lamp, which I hated.  I LOVE it!

Project details:
1.  I lightly sanded the wood with a medium grit sanding block
2.  Wiped all the dust off
3.  Gave it 1 coat of Rust-Oleum’s Painter’s Touch Ultra Cover 2x gray primer
4.  Gave it 2 coats of Rust-Oleum’s Painter’s Touch Ultra Cover 2x in Winter Gray

Thursday, March 1, 2012

A little bit of Sunshine

My latest and greatest (completed) Pinterest inspired project is lamp re-vamps.  I was at a local thrift store this last weekend and found some gorgeous (but hideous) brass lamps for sale and knew they would be perfect painted yellow.  I snatched them up, brought them home and painted away.  Here is the process.

Here is what the lamp looked like before.
First, I took off the lamp shade (which I bought at Big Lots), then I wiped it down to remove dust.  Then I taped off the cord and top electrical part (the place where the light bulb goes) by putting both parts with plastic sandwich bags and then taping them shut and securing them with green Froggers tape. 
Next I gave it a good coat of Rust-Oleum Painters Touch Ultra Cover spray primer.
I let it dry for about 30 minutes and then gave it 2 coats (letting it dry 20 minutes in between coats) of Rust-Oleum Gloss Protective Enamel in Sunburst Yellow.
I let it dry in the sun for about an hour before I brought it in and added the lamp shade back on it.  The result was this!


I did 2 so here is the other one.
 Oh and in case you are wondering, here is a shot of the paint cans I used.
And now, a side by side.
 I love them!  They bring a smile to my face every time I pass by, and they are a much needed solution to our lack of lighting in the living room.

Tuesday, February 28, 2012

Just for fun...

A sneak peak at tomorrows project.  It includes my favorite color and I can't wait to share.


Spring decorating can be just as fun

Usually Fall and Christmas decorating is my most favorite time of year but this year I really enjoyed creating special decor for the Spring.  I was searching on Pinterest for something pretty and Springy but not to commercial Easter.  I found these images as inspiration...

Which helped me to come up with these cute items around my living room.
 Best thing about this project...its cost me $5.00!  I had all the apothecary jars in my living room already and the moss, birdies, and nest were from past weddings.  The only thing I had to buy were the eggs from Michaels

Items I used:
-regular green moss (can be bought at Michaels)
-Spanish moss (also can be bought at Michaels)
-Birds (I think they came from Save on Crafts)
-Nest (I think that came from Save on Crafts too)
-Pastel eggs from Micheals
-Manzanita branch piece (sand blasted)