

Monday, June 18, 2012
Today I felt...
...like a REAL mom. I mean I feel like a mom every day but today I felt like a REAL "live" Mom because I had to take my sweet baby Eli to the doctor with a fever of 101. It turned out he has an ear infection and got a prescription for Amoxicillin and in my book, that is REAL mom status all the way. When I was little I had ear infections all the time and it seemed like I lived on Amoxicillin so to give it to my sweet baby boy made me remember the days my mom took care of me and helped me get better. It was a day full off fever, meds and snuggly naps. While I don't want Eli to feel bad, I didn't mind the mandatory snuggles.
Friday, June 15, 2012
Cool wedding FEATURE
I rarely post about work on this blog, see here for Flower blog, but I just had to feature this one. I was so honored to be featured by True Photography on their flower blog. We worked on a gorgeous wedding together and the pictures are amazing!


Thursday, June 14, 2012
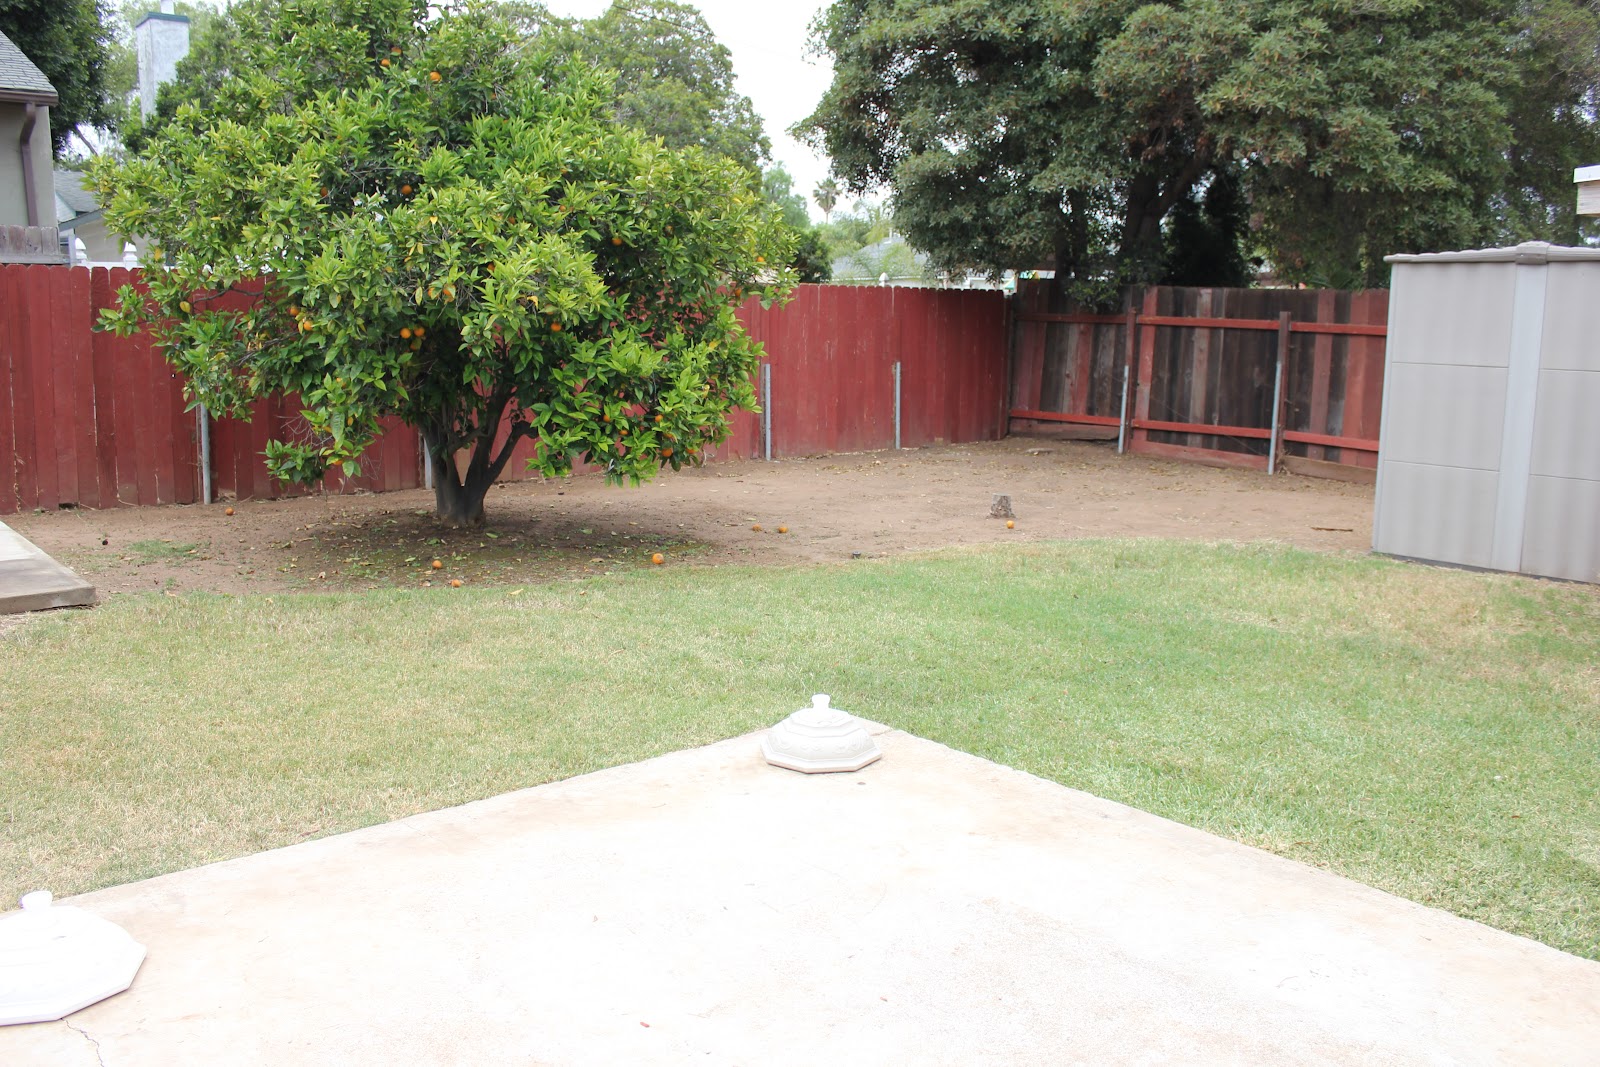
Updated Outdoor Space
I have never done a post on our backyard or even shared a picture. Mostly it is because we never used to go out there but also because it had a horrible patio covering that was falling down and just plain old ugly, it looked like this...
 Actually it doesn't look so bad it this picture but believe me it was. Some of the posts were rotting from below so they were sinking in the post holes and making it so some parts of the covering were high and some were so low even I (only 5'4") had to duck. With this unsafe eye sore we never used the back yard...EVER! Luckily, I decided to throw my sisters baby shower out here and knew I had to do something.
 Immediately we got to work...
First step, we tore the covering down and posted the wood on Craigslist as free, it was gone by the end of the day!
Then I told my husband I wanted a new fence since this one was falling down, had termite damage and was really short. I hated it but of course being that we don't have endless amounts of cash laying around he told me that it probably wasn't going to happen. Or so he thought ;)
A few days after he told me NO and I pouted because, "how was I supposed to throw a great shower with a shabby fence" I woke up and heard our neighbors across the alley tearing their old wooden fence down. Things just work out sometimes and I told my husband that I was going to ask them for their old fence and have it re-worked into ours. I honestly believe he didn;t believe I would actually do it but I walked right over there with Eli on my hip and innocently asked while batting my eyelashes, what they planned on doing with that old fence. Trash it was the answer so by the end of the day it was on our patio.
Next step, find labor. Good ole Jeremiah likes to be "kind of" handy but fence building was not on his list of "fun" things to do. All I had to do was hire our gardener to re-purpose our existing (horizontal paned) fence and the new/old fence materials I had just aquired and 2 days later a re-purposed absolutely AMAZING fence. Well compared to the old one anyway.
Here is what it looked like before.

 And here is a shot of how the fence looks now. No more spying into the neighbors yard or looking into the ugly alley.
 So before I loose your attention, here are the old shots of how our backyard looked BEFORE...


 And here are the new shots of our cleaned up and more private backyard.


 If you notice along the back of the yard the fence is a different kind of fencing material, that is the neighbors old fence and then the 2 sides of the yard are our old fence that was horizontal flipped up to add more privacy.
Our gardner charged us just
-$500 for the labor
-he used the existing cemented fence posts and all the old fence panels
-bought about $200 worth of extra materials (2x4's, nails, joint brackets, etc)
In the end, the entire project cost us only $700 compared to the $1500+ it would have cost for the materials alone of a new fence and the labor to install it.
It still needs a lot of work and still looks a little bare but it is an improvement already. Eventually we would like to build a more permanent structure over the patio and maybe build a BBQ area but for now we will be enjoying some summer parties out here.


First step, we tore the covering down and posted the wood on Craigslist as free, it was gone by the end of the day!
Then I told my husband I wanted a new fence since this one was falling down, had termite damage and was really short. I hated it but of course being that we don't have endless amounts of cash laying around he told me that it probably wasn't going to happen. Or so he thought ;)
A few days after he told me NO and I pouted because, "how was I supposed to throw a great shower with a shabby fence" I woke up and heard our neighbors across the alley tearing their old wooden fence down. Things just work out sometimes and I told my husband that I was going to ask them for their old fence and have it re-worked into ours. I honestly believe he didn;t believe I would actually do it but I walked right over there with Eli on my hip and innocently asked while batting my eyelashes, what they planned on doing with that old fence. Trash it was the answer so by the end of the day it was on our patio.
Next step, find labor. Good ole Jeremiah likes to be "kind of" handy but fence building was not on his list of "fun" things to do. All I had to do was hire our gardener to re-purpose our existing (horizontal paned) fence and the new/old fence materials I had just aquired and 2 days later a re-purposed absolutely AMAZING fence. Well compared to the old one anyway.
Here is what it looked like before.


Our gardner charged us just
-$500 for the labor
-he used the existing cemented fence posts and all the old fence panels
-bought about $200 worth of extra materials (2x4's, nails, joint brackets, etc)
In the end, the entire project cost us only $700 compared to the $1500+ it would have cost for the materials alone of a new fence and the labor to install it.
It still needs a lot of work and still looks a little bare but it is an improvement already. Eventually we would like to build a more permanent structure over the patio and maybe build a BBQ area but for now we will be enjoying some summer parties out here.
Monday, June 11, 2012
Featured on Better After!!!


Friday, June 8, 2012
Our little 8 month old
Our little man is 8 months old already and such a little terror already. He is standing, walking along the couch and can hold his balance on his own for about 3-4 seconds. He wants to get into everything and has recently learned to climb up anything in his path. He is so loving and has learned to hug and grab onto your neck, it melts my heart! Here are his 8 month photos. (Don't mind the "home" haircut where I kind of cut his bangs a little too short :)


Wednesday, June 6, 2012
Eli's first pool experience
We took Eli in the pool for the 1st time yesterday and he absolutely loved it!


 Jeremiah did the "blow in his face" trick to dunk him and while it wasn't his favorite part, he wasn't too upset.
Looking forward to many summers of pool fun!


Looking forward to many summers of pool fun!
Tuesday, June 5, 2012
Eli and his Friend-emy


Sometimes Eli will crawl past the vacuum and scream because he hates it but today they were friends.
THE END :)
Monday, June 4, 2012
Work with what you GOT-Painted Kitchen Floors
FLOOR UPDATE: (4/15/2015)
I know you have all asked for update pictures and I have FINALLY gotten around to snapping some iPhone pictures to share. The floors are now 3 years old and while they are dirty in these pictures (sorry), they are still holding up really really well. I am very pleased with their duration of numerous gatherings and 3 toddlers constantly running, playing and dragging toys along them all day long. I would still recommend this method and am pleased with them each time I look down.


We have an update in the ever evolving kitchen. I recently painted the linoleum kitchen floors (another Pinterest inspiration) with regular old house paint. It was a fun process and not one that I was sure was going to "stick" but it did and I am so happy. Before I go into detail about the "how to" here are some kitchen evolution shots...
Picture 1: How the kitchen looked when we moved in

Picture 2: How the kitchen looked after we painted the kitchen cabinets white and installed new Ikea counter tops, added a white subway tile backsplash, and painted the walls.

Picture 3: How it looks now, after the painted floor project
 I am so in love it with it.
So now for the HOW TO...
Let me start with saying that painting linoleum is not for all linoleum. Peel and stick or slick linoleum will not work for this process. We had old, worn linoleum that was installed in one big sheet. My sister-in-law tried to paint her peel and stick bathroom linoleum and the paint is just peeling right off.
Here is the process:
Step 1: clean floors really well and let them completely dry (I used a degreaser and mopped the floors)
 Step 2: Paint the floors with the Base/Bottom color. I used Behr Paint and Primer In One-FLAT. Here is a picture of the paint cans.


I know you have all asked for update pictures and I have FINALLY gotten around to snapping some iPhone pictures to share. The floors are now 3 years old and while they are dirty in these pictures (sorry), they are still holding up really really well. I am very pleased with their duration of numerous gatherings and 3 toddlers constantly running, playing and dragging toys along them all day long. I would still recommend this method and am pleased with them each time I look down.
We have an update in the ever evolving kitchen. I recently painted the linoleum kitchen floors (another Pinterest inspiration) with regular old house paint. It was a fun process and not one that I was sure was going to "stick" but it did and I am so happy. Before I go into detail about the "how to" here are some kitchen evolution shots...
Picture 1: How the kitchen looked when we moved in
Picture 2: How the kitchen looked after we painted the kitchen cabinets white and installed new Ikea counter tops, added a white subway tile backsplash, and painted the walls.
Picture 3: How it looks now, after the painted floor project
So now for the HOW TO...
Let me start with saying that painting linoleum is not for all linoleum. Peel and stick or slick linoleum will not work for this process. We had old, worn linoleum that was installed in one big sheet. My sister-in-law tried to paint her peel and stick bathroom linoleum and the paint is just peeling right off.
Here is the process:
Step 1: clean floors really well and let them completely dry (I used a degreaser and mopped the floors)


Step 3: Stencil the design. I bought a Martha Stewart stencil from Michaels and used the same Behr paint in a different color. I used a small foam roller to keep the paint even, make sure you don't load the roller with too much paint or it will bleed under the stencil and make a mess. As far as the placement goes, the old linoleum had squares in it so I just used them as a guide and did every other square.

Step 4: Let paint dry and then apply poly urethane. I used a water based poly and followed the instructions on application. I applied 4 coats of poly just to be safe.

Let dry for 2 days to be absolutely sure its cured and DONE!!! We have had these floors painted for about 2 months and they still look absolutely gorgeous.
In case you are wondering about paint colors, the colors are:
Base: Glidden GLN40-Wood Smoke, I had it color matched so that I could use the Behr prime/paint
Stencil: GLC13-Crisp Linen White, also color matched to Behr Prime/Paint
Color Codes:

Here are a couple more shots of the floor taken just this morning.


Please email me or leave a comment if you have any questions about technique or process. And leave a link if you did this yourself, I would love to see others work.
:)
Subscribe to:
Posts (Atom)